Overview
Customers have several options when selecting the source for a Softdrive template. You can upload your own pre-configured golden image, or deploy a new Softdrive computer and configure it as needed before converting it into a template.
This advanced configuration includes joining the computer to an on-premises Active Directory domain or Microsoft Entra ID, installing required applications, applying system settings, and preparing the environment based on your organization’s requirements.
The chosen machine will serve as the foundation for your template and should reflect your desired application set, updates, and configuration standards before proceeding.
This guide explains how to create a Windows template in Softdrive that can automatically join a device to Microsoft Entra ID (and optionally enroll in Intune) or to an on-premises Active Directory domain on first boot. First method will require more steps but will avoid any possible issue.
Prerequisites
- Access to the Softdrive Dashboard (Softnet) as Administrator.
- A softdrive machine newly installed.
- An
Apply-PPKG.ps1script to apply the package during setup - An
unattend.xmlfile to automate OOBE and run the script - A PPKG configured for the intended join type (Microsoft Entra ID or on-premises Active Directory) ready for automated enrollment/domain join. More info
- For on-premises Active Directory joins, ensure the deployed computer has network connectivity and DNS resolution to a writable domain controller during the join process.
Procedure
Method 1: Template Creation brand new VM (Best Practices)
Method 2- Template Creation Existing VMs
Method 1: Template Creation from brand new VM (Best Practices)
1)Set computer in audit mode
We strongly recommend building your Softdrive template using Windows Audit Mode before installing applications or running Sysprep.
This helps prevent:
- OOBE loop issues
- Appx provisioning conflicts
- Sysprep post-restart failures
- Active Directory/Entra ID join inconsistencies
Step-by-Step Audit Mode Process
- Enter Audit Mode during OOBE
On the first OOBE screen, press:Shift + F10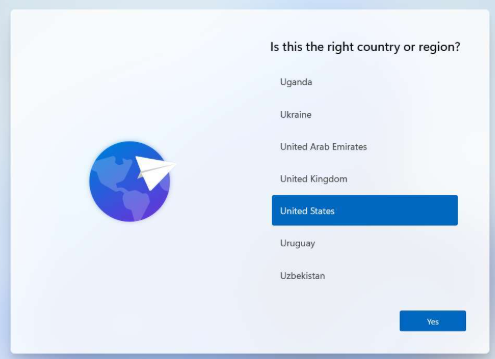
- The command prompt window will open, run the following command to bypass network requirement:
The computer will restart.OOBE\BYPASSNRO - After restart, press
Shift + F10again and enable/configure the built-in Administrator account:net user Administrator Password123 net user Administrator /active:yes - Enter Audit Mode by pressing:
CTRL + SHIFT + F3
The system will reboot automatically into Audit Mode. - Windows will log in automatically as Administrator.
2)Apply Windows Updates
While in Audit Mode, install all available Windows updates to ensure the image is fully patched and secure. Open Settings → Windows Update and install updates until the system reports that it is up to date. Reboot as many times as necessary and verify that no pending updates remain before proceeding. Updating at this stage prevents post-deployment update issues, reduces security risks, and ensures consistency across all machines created from the template.
3)Install desired Apps
Install all required applications while still in Audit Mode. This includes productivity tools, drivers, and any client-specific software such as Revit or related add-ins. After installation, reboot if prompted and launch major applications once to complete first-run configuration. Do not sign in to user accounts or activate licenses during this phase. Installing software in Audit Mode ensures applications are properly integrated into the system without tying them to a specific user profile.
When installing applications for a golden image, it’s critical to treat the image as a clean, reusable baseline rather than a personalized workstation. Best practice is to install only system-wide, machine-level applications using MSI installers whenever possible, and to avoid launching applications after installation unless explicitly required to complete setup. Do not sign in to apps, activate licenses, configure user profiles, or point software to license servers during image creation, as these actions often generate per-user data, cached tokens, AppX registrations, or background services that can break Sysprep or cause issues for future users. Avoid installing software that relies on EXE bootstrap installers, per-user components, or background updaters (such as desktop connectors or auto-updating launchers) unless a supported MSI or silent enterprise method exists. Always complete Windows Updates before application installs, verify there are no pending reboots, and keep the image free of unnecessary AppX packages. In short: install quietly, install globally, don’t launch, don’t log in, don’t license—save all user-specific configuration and activation for post-deployment, not the golden image itself.
When building VDI golden images, installing many applications in a single pass and running Sysprep only at the end concentrates all risk into one critical step, making failures difficult to diagnose and often forcing lengthy trial-and-error removal of applications. A batched installation approach—installing apps in small, logical groups and validating the image between each batch—significantly reduces this risk. By taking snapshots and running Sysprep in audit mode (sysprep /audit /reboot) after each group, administrators can confirm system health, immediately identify which batch introduced an issue, and roll back quickly if needed. This staged validation process improves reliability, shortens troubleshooting cycles, and provides a controlled, repeatable build methodology, ensuring that the final Sysprep generalization is predictable and stable for production cloning.
4) Disable BitLocker
Before sealing the image, ensure BitLocker is disabled. BitLocker encryption should not be active on a template machine, as encryption keys can cause issues when the image is cloned or deployed to new virtual machines. To verify, open Control Panel → BitLocker Drive Encryption and confirm that the system drive shows BitLocker as turned off. If enabled, suspend or fully disable it before proceeding with Sysprep. This prevents boot errors and deployment failures in virtualized environments.
- Open an elevated PowerShell or Command Promptand run:
manage-bde -status - If BitLocker is ON for C:, turn it off:
manage-bde -off C: - Wait until full decryption completes.Check progress with:
Do not run Sysprep until decryption is 100% complete.manage-bde -status

Clean up the system (Optional but recommended)
Open Command Prompt and run:
cleanmgr /sagerun:1- Remove unused user accounts and files.
- Optionally, run third-party cleanup utilities.
5) Create the Apply-PPKG PowerShell script
This script runs during setup and applies the provisioning package (.ppkg). It supports both Microsoft Entra ID and on-premises Active Directory joins. For an Active Directory join, it first waits until a domain controller can be discovered; for a Microsoft Entra ID join, the domain controller check is skipped. It also writes a log file so you can confirm it ran successfully.
Before using the script, make sure to update the $joinType value to match your environment ("Domain" for an on-premises Active Directory join or "Entra" for a Microsoft Entra ID join). If $joinType is set to "Domain", also update the $domain value with your organization’s Active Directory domain name.
# Apply-PPKG.ps1

$pkg = "C:\Setup\enroll.ppkg"
$log = "C:\Setup\Apply-PPKG.log"

# Join type:
#   "Domain" = on-premises Active Directory domain join
#   "Entra"  = Microsoft Entra ID join
$joinType = "Domain"

# Required only when $joinType is "Domain".
# This value is ignored when $joinType is "Entra".
$domain = "contoso.com"

$maximumAttempts = 30
$delaySeconds = 20

function Write-Log {
    param([string]$Message)

    "[$(Get-Date -Format s)] $Message" |
        Out-File -FilePath $log -Append -Encoding utf8
}

# Start a new log
"[$(Get-Date -Format s)] Starting PPKG process." |
    Out-File -FilePath $log -Encoding utf8

Write-Log "Configured join type: $joinType"

if (-not (Test-Path $pkg)) {
    Write-Log "ERROR: PPKG not found at $pkg."
    exit 2
}

# Validate the configured join type
if ($joinType -notin @("Domain", "Entra")) {
    Write-Log "ERROR: Invalid join type '$joinType'. Valid values are 'Domain' or 'Entra'."
    exit 3
}

# For on-premises Active Directory only, wait until a domain controller
# can be discovered before applying the provisioning package.
if ($joinType -eq "Domain") {

    if ([string]::IsNullOrWhiteSpace($domain)) {
        Write-Log "ERROR: A domain name must be configured when joinType is 'Domain'."
        exit 4
    }

    if (-not (Get-Command nltest.exe -ErrorAction SilentlyContinue)) {
        Write-Log "ERROR: nltest.exe is not available on this computer."
        exit 5
    }

    Write-Log "Domain join selected. Waiting for a domain controller for: $domain"

    $domainAvailable = $false

    for ($attempt = 1; $attempt -le $maximumAttempts; $attempt++) {
        Write-Log "Domain discovery attempt $attempt of $maximumAttempts."

        $nltestOutput = & nltest.exe "/dsgetdc:$domain" "/force" 2>&1
        $nltestExitCode = $LASTEXITCODE

        $nltestOutput |
            Out-File -FilePath $log -Append -Encoding utf8

        if ($nltestExitCode -eq 0) {
            Write-Log "Successfully located a domain controller for $domain."
            $domainAvailable = $true
            break
        }

        Write-Log "Domain controller not available. Waiting $delaySeconds seconds."
        Start-Sleep -Seconds $delaySeconds
    }

    if (-not $domainAvailable) {
        Write-Log "ERROR: Domain controller for $domain could not be located after $maximumAttempts attempts."
        exit 1355
    }
}
else {
    Write-Log "Microsoft Entra ID join selected. Domain controller discovery is not required and will be skipped."
}

try {
    if (-not (Get-Command Install-ProvisioningPackage -ErrorAction SilentlyContinue)) {
        throw "Install-ProvisioningPackage is not available on this computer."
    }

    Write-Log "Applying provisioning package: $pkg"

    $provisioningResult = Install-ProvisioningPackage `
        -PackagePath $pkg `
        -ForceInstall `
        -QuietInstall `
        -LogsDirectoryPath "C:\Setup" `
        -ErrorAction Stop

    if ($null -ne $provisioningResult) {
        $provisioningResult |
            Out-String |
            Out-File -FilePath $log -Append -Encoding utf8
    }

    Write-Log "Provisioning package installation command completed successfully."

    # The final join state may not be fully reflected until Windows completes
    # provisioning and/or reboots. Log the current state for troubleshooting.
    if ($joinType -eq "Domain") {
        try {
            $computerSystem = Get-CimInstance -ClassName Win32_ComputerSystem -ErrorAction Stop

            if ($computerSystem.PartOfDomain) {
                Write-Log "Windows currently reports domain membership: $($computerSystem.Domain)"
            }
            else {
                Write-Log "Windows does not yet report domain membership. The join may complete after provisioning/restart."
            }
        }
        catch {
            Write-Log "WARNING: Unable to query current domain membership: $($_.Exception.Message)"
        }
    }
    else {
        if (Get-Command dsregcmd.exe -ErrorAction SilentlyContinue) {
            Write-Log "Current Microsoft Entra registration status:"
            & dsregcmd.exe /status 2>&1 |
                Select-String -Pattern "AzureAdJoined|DomainJoined|DeviceId|TenantId" |
                ForEach-Object { Write-Log $_.Line.Trim() }
        }
    }

    # Trigger Intune Management Extension sync only if the task already exists.
    # This is safe for both join types; on systems without Intune the task is skipped.
    $intuneTask = "\Microsoft\IntuneManagementExtension\PushLaunch"

    & schtasks.exe /query /tn $intuneTask 1>$null 2>$null

    if ($LASTEXITCODE -eq 0) {
        Write-Log "Starting Intune Management Extension PushLaunch task."

        & schtasks.exe /run /tn $intuneTask 2>&1 |
            Out-File -FilePath $log -Append -Encoding utf8
    }
    else {
        Write-Log "Intune PushLaunch task is not currently available. No Intune sync was triggered."
    }

    Write-Log "PPKG process completed."
    exit 0
}
catch {
    Write-Log "ERROR applying PPKG: $($_.Exception.Message)"
    exit 1
}
6) Create the unattend.xml file
In the specialize pass, the unattend file runs Apply-PPKG.ps1. In the oobeSystem pass, it sets OOBE options so the initial setup experience can be minimized or bypassed.
<?xml version="1.0" encoding="utf-8"?>
<unattend xmlns="urn:schemas-microsoft-com:unattend"
          xmlns:wcm="http://schemas.microsoft.com/WMIConfig/2002/State"
          xmlns:xsi="http://www.w3.org/2001/XMLSchema-instance">

  <!-- SPECIALIZE -->
  <settings pass="specialize">
    <component name="Microsoft-Windows-Deployment"
               processorArchitecture="amd64"
               publicKeyToken="31bf3856ad364e35"
               language="neutral"
               versionScope="nonSxS">
      <RunSynchronous>
        <RunSynchronousCommand wcm:action="add">
          <Order>1</Order>
          <Description>Apply Enroll PPKG</Description>
          <Path>powershell.exe -ExecutionPolicy Bypass -File "C:\Setup\Apply-PPKG.ps1"</Path>
        </RunSynchronousCommand>
      </RunSynchronous>
    </component>

    <component name="Microsoft-Windows-Shell-Setup"
               processorArchitecture="amd64"
               publicKeyToken="31bf3856ad364e35"
               language="neutral"
               versionScope="nonSxS">
      <RegisteredOwner>Softdrive</RegisteredOwner>
      <RegisteredOrganization>Softdrive</RegisteredOrganization>
      <TimeZone>SA Western Standard Time</TimeZone>
    </component>
  </settings>

  <!-- OOBE SYSTEM -->
  <settings pass="oobeSystem">
    <component name="Microsoft-Windows-International-Core"
               processorArchitecture="amd64"
               publicKeyToken="31bf3856ad364e35"
               language="neutral"
               versionScope="nonSxS">
      <InputLocale>en-US</InputLocale>
      <SystemLocale>en-US</SystemLocale>
      <UILanguage>en-US</UILanguage>
      <UserLocale>en-US</UserLocale>
    </component>

    <component name="Microsoft-Windows-Shell-Setup"
               processorArchitecture="amd64"
               publicKeyToken="31bf3856ad364e35"
               language="neutral"
               versionScope="nonSxS">
      <OOBE>
        <HideEULAPage>true</HideEULAPage>
        <HideOEMRegistrationScreen>true</HideOEMRegistrationScreen>
        <HideOnlineAccountScreens>true</HideOnlineAccountScreens>
        <HideWirelessSetupInOOBE>true</HideWirelessSetupInOOBE>
        <NetworkLocation>Work</NetworkLocation>
        <ProtectYourPC>1</ProtectYourPC>
        <SkipMachineOOBE>true</SkipMachineOOBE>
        <SkipUserOOBE>true</SkipUserOOBE>
      </OOBE>
      <RegisteredOwner>Softdrive</RegisteredOwner>
      <RegisteredOrganization>Softdrive</RegisteredOrganization>
    </component>
  </settings>

</unattend>
Customizing the unattend.xml (Optional)
The provided unattend.xml is a baseline example designed to support automated provisioning, Microsoft Entra ID enrollment or on-premises Active Directory domain join, and OOBE bypass.
End users and administrators are free to customize this file to meet their organization’s requirements. Common customizations include:
- Changing the time zone
- Setting a custom computer naming convention
- Adjusting regional and language settings
- Enabling or disabling specific OOBE options
- Adding additional RunSynchronous commands
If changes are made, ensure the file remains valid XML and is tested on a non-production template before deployment.
7)Create the C:\Setup folder and move files there
On the Softdrive VM that will be used as a template, create a folder named C:\Setup and copy the following files into it:
enroll.ppkg(created using this guide)Apply-PPKG.ps1(created in Step 3)unattend.xml(created in Step 4)
C:\
└── Setup\
    ├── enroll.ppkg
    ├── Apply-PPKG.ps1
    └── unattend.xml
8) Run Sysprep via CMD (with unattend.xml)
Run the following command from an elevated Command Prompt. This will generalize the image, start OOBE on next boot, and shut down the machine when complete.
C:\Windows\System32\Sysprep\sysprep.exe /generalize /oobe /shutdown /unattend:C:\Setup\unattend.xmlAfter Sysprep completes, the VM will shut down. Do not boot it again until you are ready to save it as a template in Softnet.
9)Save the machine as a template
- Go to the Softnet Dashboard.
- Navigate to Computers and find the machine that was sysprepped.
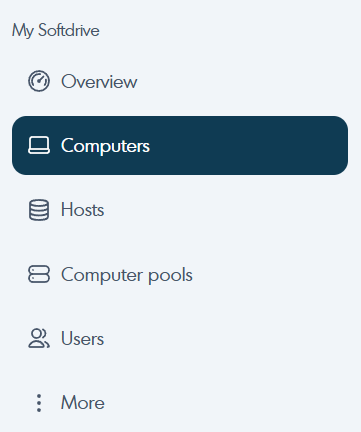
- Click the computer and select "Save as Template".
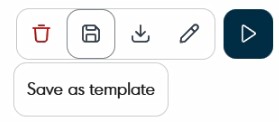
This notifies Softdrive to complete the template creation process. Please do not power the machine on until you receive a confirmation email from support@softdrive.co.
First boot after Sysprep
- On next boot, Windows behavior will depend on the provisioning package and join type. Microsoft Entra ID deployments may show organization sign-in/setup behavior, while on-premises Active Directory deployments should complete the domain join when domain connectivity and DNS are available.
- The provisioning package should apply during setup, and the device should automatically join the configured Microsoft Entra tenant or on-premises Active Directory domain.
Additional Notes
- If your environment requires encryption, enable BitLocker after the template is created.
Method 2: Template Creation existing VMs
1)Disable BitLocker
Before sealing the image, ensure BitLocker is disabled. BitLocker encryption should not be active on a template machine, as encryption keys can cause issues when the image is cloned or deployed to new virtual machines. To verify, open Control Panel → BitLocker Drive Encryption and confirm that the system drive shows BitLocker as turned off. If enabled, suspend or fully disable it before proceeding with Sysprep. This prevents boot errors and deployment failures in virtualized environments.
- Open an elevated PowerShell or Command Promptand run:
manage-bde -status - If BitLocker is ON for C:, turn it off:
manage-bde -off C: - Wait until full decryption completes.Check progress with:
Do not run Sysprep until decryption is 100% complete.manage-bde -status
Clean up the system (Optional but recommended)
Open Command Prompt and run:
cleanmgr /sagerun:1- Remove unused user accounts and files.
- Optionally, run third-party cleanup utilities.
2) Create the Apply-PPKG PowerShell script
This script runs during setup and applies the provisioning package (.ppkg). It supports both Microsoft Entra ID and on-premises Active Directory joins. For an Active Directory join, it first waits until a domain controller can be discovered; for a Microsoft Entra ID join, the domain controller check is skipped. It also writes a log file so you can confirm it ran successfully.
Before using the script, make sure to update the $joinType value to match your environment ("Domain" for an on-premises Active Directory join or "Entra" for a Microsoft Entra ID join). If $joinType is set to "Domain", also update the $domain value with your organization’s Active Directory domain name.
# Apply-PPKG.ps1

$pkg = "C:\Setup\enroll.ppkg"
$log = "C:\Setup\Apply-PPKG.log"

# Join type:
#   "Domain" = on-premises Active Directory domain join
#   "Entra"  = Microsoft Entra ID join
$joinType = "Domain"

# Required only when $joinType is "Domain".
# This value is ignored when $joinType is "Entra".
$domain = "contoso.com"

$maximumAttempts = 30
$delaySeconds = 20

function Write-Log {
    param([string]$Message)

    "[$(Get-Date -Format s)] $Message" |
        Out-File -FilePath $log -Append -Encoding utf8
}

# Start a new log
"[$(Get-Date -Format s)] Starting PPKG process." |
    Out-File -FilePath $log -Encoding utf8

Write-Log "Configured join type: $joinType"

if (-not (Test-Path $pkg)) {
    Write-Log "ERROR: PPKG not found at $pkg."
    exit 2
}

# Validate the configured join type
if ($joinType -notin @("Domain", "Entra")) {
    Write-Log "ERROR: Invalid join type '$joinType'. Valid values are 'Domain' or 'Entra'."
    exit 3
}

# For on-premises Active Directory only, wait until a domain controller
# can be discovered before applying the provisioning package.
if ($joinType -eq "Domain") {

    if ([string]::IsNullOrWhiteSpace($domain)) {
        Write-Log "ERROR: A domain name must be configured when joinType is 'Domain'."
        exit 4
    }

    if (-not (Get-Command nltest.exe -ErrorAction SilentlyContinue)) {
        Write-Log "ERROR: nltest.exe is not available on this computer."
        exit 5
    }

    Write-Log "Domain join selected. Waiting for a domain controller for: $domain"

    $domainAvailable = $false

    for ($attempt = 1; $attempt -le $maximumAttempts; $attempt++) {
        Write-Log "Domain discovery attempt $attempt of $maximumAttempts."

        $nltestOutput = & nltest.exe "/dsgetdc:$domain" "/force" 2>&1
        $nltestExitCode = $LASTEXITCODE

        $nltestOutput |
            Out-File -FilePath $log -Append -Encoding utf8

        if ($nltestExitCode -eq 0) {
            Write-Log "Successfully located a domain controller for $domain."
            $domainAvailable = $true
            break
        }

        Write-Log "Domain controller not available. Waiting $delaySeconds seconds."
        Start-Sleep -Seconds $delaySeconds
    }

    if (-not $domainAvailable) {
        Write-Log "ERROR: Domain controller for $domain could not be located after $maximumAttempts attempts."
        exit 1355
    }
}
else {
    Write-Log "Microsoft Entra ID join selected. Domain controller discovery is not required and will be skipped."
}

try {
    if (-not (Get-Command Install-ProvisioningPackage -ErrorAction SilentlyContinue)) {
        throw "Install-ProvisioningPackage is not available on this computer."
    }

    Write-Log "Applying provisioning package: $pkg"

    $provisioningResult = Install-ProvisioningPackage `
        -PackagePath $pkg `
        -ForceInstall `
        -QuietInstall `
        -LogsDirectoryPath "C:\Setup" `
        -ErrorAction Stop

    if ($null -ne $provisioningResult) {
        $provisioningResult |
            Out-String |
            Out-File -FilePath $log -Append -Encoding utf8
    }

    Write-Log "Provisioning package installation command completed successfully."

    # The final join state may not be fully reflected until Windows completes
    # provisioning and/or reboots. Log the current state for troubleshooting.
    if ($joinType -eq "Domain") {
        try {
            $computerSystem = Get-CimInstance -ClassName Win32_ComputerSystem -ErrorAction Stop

            if ($computerSystem.PartOfDomain) {
                Write-Log "Windows currently reports domain membership: $($computerSystem.Domain)"
            }
            else {
                Write-Log "Windows does not yet report domain membership. The join may complete after provisioning/restart."
            }
        }
        catch {
            Write-Log "WARNING: Unable to query current domain membership: $($_.Exception.Message)"
        }
    }
    else {
        if (Get-Command dsregcmd.exe -ErrorAction SilentlyContinue) {
            Write-Log "Current Microsoft Entra registration status:"
            & dsregcmd.exe /status 2>&1 |
                Select-String -Pattern "AzureAdJoined|DomainJoined|DeviceId|TenantId" |
                ForEach-Object { Write-Log $_.Line.Trim() }
        }
    }

    # Trigger Intune Management Extension sync only if the task already exists.
    # This is safe for both join types; on systems without Intune the task is skipped.
    $intuneTask = "\Microsoft\IntuneManagementExtension\PushLaunch"

    & schtasks.exe /query /tn $intuneTask 1>$null 2>$null

    if ($LASTEXITCODE -eq 0) {
        Write-Log "Starting Intune Management Extension PushLaunch task."

        & schtasks.exe /run /tn $intuneTask 2>&1 |
            Out-File -FilePath $log -Append -Encoding utf8
    }
    else {
        Write-Log "Intune PushLaunch task is not currently available. No Intune sync was triggered."
    }

    Write-Log "PPKG process completed."
    exit 0
}
catch {
    Write-Log "ERROR applying PPKG: $($_.Exception.Message)"
    exit 1
}3)Create the unattend.xml file
In the specialize pass, the unattend file runs Apply-PPKG.ps1. In the oobeSystem pass, it sets OOBE options so the initial setup experience can be minimized or bypassed.
<?xml version="1.0" encoding="utf-8"?>
<unattend xmlns="urn:schemas-microsoft-com:unattend"
          xmlns:wcm="http://schemas.microsoft.com/WMIConfig/2002/State"
          xmlns:xsi="http://www.w3.org/2001/XMLSchema-instance">

  <!-- SPECIALIZE -->
  <settings pass="specialize">
    <component name="Microsoft-Windows-Deployment"
               processorArchitecture="amd64"
               publicKeyToken="31bf3856ad364e35"
               language="neutral"
               versionScope="nonSxS">
      <RunSynchronous>
        <RunSynchronousCommand wcm:action="add">
          <Order>1</Order>
          <Description>Apply Enroll PPKG</Description>
          <Path>powershell.exe -ExecutionPolicy Bypass -File "C:\Setup\Apply-PPKG.ps1"</Path>
        </RunSynchronousCommand>
      </RunSynchronous>
    </component>

    <component name="Microsoft-Windows-Shell-Setup"
               processorArchitecture="amd64"
               publicKeyToken="31bf3856ad364e35"
               language="neutral"
               versionScope="nonSxS">
      <RegisteredOwner>Softdrive</RegisteredOwner>
      <RegisteredOrganization>Softdrive</RegisteredOrganization>
      <TimeZone>SA Western Standard Time</TimeZone>
    </component>
  </settings>

  <!-- OOBE SYSTEM -->
  <settings pass="oobeSystem">
    <component name="Microsoft-Windows-International-Core"
               processorArchitecture="amd64"
               publicKeyToken="31bf3856ad364e35"
               language="neutral"
               versionScope="nonSxS">
      <InputLocale>en-US</InputLocale>
      <SystemLocale>en-US</SystemLocale>
      <UILanguage>en-US</UILanguage>
      <UserLocale>en-US</UserLocale>
    </component>

    <component name="Microsoft-Windows-Shell-Setup"
               processorArchitecture="amd64"
               publicKeyToken="31bf3856ad364e35"
               language="neutral"
               versionScope="nonSxS">
      <OOBE>
        <HideEULAPage>true</HideEULAPage>
        <HideOEMRegistrationScreen>true</HideOEMRegistrationScreen>
        <HideOnlineAccountScreens>true</HideOnlineAccountScreens>
        <HideWirelessSetupInOOBE>true</HideWirelessSetupInOOBE>
        <NetworkLocation>Work</NetworkLocation>
        <ProtectYourPC>1</ProtectYourPC>
        <SkipMachineOOBE>true</SkipMachineOOBE>
        <SkipUserOOBE>true</SkipUserOOBE>
      </OOBE>
      <RegisteredOwner>Softdrive</RegisteredOwner>
      <RegisteredOrganization>Softdrive</RegisteredOrganization>
    </component>
  </settings>

</unattend>
Customizing the unattend.xml (Optional)
The provided unattend.xml is a baseline example designed to support automated provisioning, Microsoft Entra ID enrollment or on-premises Active Directory domain join, and OOBE bypass.
End users and administrators are free to customize this file to meet their organization’s requirements. Common customizations include:
- Changing the time zone
- Setting a custom computer naming convention
- Adjusting regional and language settings
- Enabling or disabling specific OOBE options
- Adding additional RunSynchronous commands
If changes are made, ensure the file remains valid XML and is tested on a non-production template before deployment.
4)Create the C:\Setup folder and move files there
On the Softdrive VM that will be used as a template, create a folder named C:\Setup and copy the following files into it:
enroll.ppkg(created using this guide)Apply-PPKG.ps1(created in Step 3)unattend.xml(created in Step 4)
C:\
└── Setup\
    ├── enroll.ppkg
    ├── Apply-PPKG.ps1
    └── unattend.xml
5)Run Sysprep via CMD (with unattend.xml)
Run the following command from an elevated Command Prompt. This will generalize the image, start OOBE on next boot, and shut down the machine when complete.
C:\Windows\System32\Sysprep\sysprep.exe /generalize /oobe /shutdown /unattend:C:\Setup\unattend.xmlAfter Sysprep completes, the VM will shut down. Do not boot it again until you are ready to save it as a template in Softnet.
6)Save the machine as a template
- Go to the Softnet Dashboard.
- Navigate to Computers and find the machine that was sysprepped.
- Click the computer and select "Save as Template".
This notifies Softdrive to complete the template creation process. Please do not power the machine on until you receive a confirmation email from support@softdrive.co.
First boot after Sysprep
- On next boot, Windows behavior will depend on the provisioning package and join type. Microsoft Entra ID deployments may show organization sign-in/setup behavior, while on-premises Active Directory deployments should complete the domain join when domain connectivity and DNS are available.
- The provisioning package should apply during setup, and the device should automatically join the configured Microsoft Entra tenant or on-premises Active Directory domain.
Retrieving Logs for Troubleshooting
If the provisioning process does not complete successfully, review both the Windows Setup logs and the Apply-PPKG.ps1 logs. The PowerShell script creates its primary log at C:\Setup\Apply-PPKG.log, which records the selected join type, domain-controller discovery attempts for Active Directory deployments, provisioning-package installation results, and any errors returned by the script. Additional provisioning-package logs are also written to C:\Setup by the Install-ProvisioningPackage command. If the issue appears to be related to unattend.xml, Sysprep, or the specialize/oobeSystem setup passes, review the Windows Setup logs located under C:\Windows\Panther, especially setupact.log and setuperr.log. Additional unattended-setup processing information may also be available under C:\Windows\Panther\UnattendGC. When troubleshooting a failed deployment, collect the contents of C:\Setup together with the relevant files from C:\Windows\Panther so they can be reviewed by Softdrive Support.
Common mistakes and fixes
Sysprep fails immediately
- Common cause: Provisioned Appx packages or Store apps blocking Sysprep.
- Fix: Remove the problematic Appx package(s) and retry. (See Step 2.)
BitLocker still enabled or decryption not finished
- Common cause: Sysprep is run while disk decryption is still in progress.
- Fix: Confirm
manage-bde -statusshows decryption at 100% before running Sysprep.
PPKG does not apply on first boot
- Common cause: Incorrect path or missing files in
C:\Setup. - Fix: Verify
C:\Setup\enroll.ppkg,Apply-PPKG.ps1, andunattend.xmlexist before Sysprep. - Tip: Check the log file
C:\Setup\Apply-PPKG.logafter first boot. - If the PPKG applies but the join fails: For on-premises Active Directory, verify DNS resolution and connectivity to a writable domain controller. For Microsoft Entra ID, verify that the provisioning package contains valid enrollment information and that the tenant allows the device to join.
Machine boots and asks for normal OOBE setup
- Common cause:
unattend.xmlis not being used (wrong command) or XML is malformed. - Fix: Confirm the Sysprep command includes
/unattend:C:\Setup\unattend.xmland validate the XML structure.
Template saved, but someone powered it on too early
- Common cause: The sysprepped VM is booted before Softdrive completes template processing.
- Fix: Avoid powering on the VM until you receive the confirmation email from Support.
For more info please visit : https://learn.microsoft.com/en-us/windows-hardware/manufacture/desktop/sysprep--generalize--a-windows-installation?view=windows-11